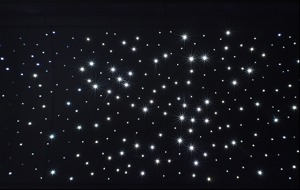
If you are like me that enjoys the magic of starry night on my ceiling, it’s time you install a star ceiling light (fiber optic light).
Fibre optic lighting projects the night sky onto the ceiling, creating a relaxing mood lighting experience.
It also creates a dreamy atmosphere, to help melt your daytime worries.
Where can I install fibre optic light?
You can install the light kits on your ceiling, cars, and floors.
To install it on your ceiling, make sure the ceiling is made with gypsum plasterboard, PVC, perspex, or there is access above the ceiling.
Fibre optic stars are ideal for living rooms, children’s rooms, bedrooms, hotels, restaurants, cinemas, clubs, bathrooms, and other places.
How does the sky ceiling light work?
The working principle is simple: It requires a single light source to illuminate hundreds of star points.
The light is transmitted from the light engine to the strands and then emitted at the end, producing twinkling lights.
Materials required to Install the starry light
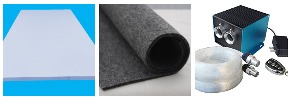
To install fibre optic star lights, you need the following tool materials:
- Fiber Optic light Kit: This is the most important and most expensive component of the project. It comprises fibre optical cables, remote control, light engine, and others.
- 2 inch acoustic foam board panel
- Black felt: This is what you will use to cover your panel, to give it a black night sky look.
- 3M78 Spray adhesive for foam: This is a special gum for foam. You will use it to attach the felt to the foam. Note, during my installation, I used several adhesives, but they usually dissolve the foam until I used 3M78 spray.
- White elmers glue: This is what you will use to hold the fibre optic strands firmly inside the foam.
- White ink: You will use this to mark where your stars will enter on the felt.
- Black screws and washers to attach the panel to your ceiling.
- Toenail clipper to trim the ends of your fibre optic strands.
- Fire retardant spray in case of fire outbreak.
- Disposable latex gloves
- Screw driver
- Scissors
- Pencil
- Knife
- Tape measure.
How to install the star ceiling light
Once the materials are ready, you can begin with the installation.
Use your tape measure to measure the length and width of the ceiling to know the number of panels it will take.
Measure and cut the star ceiling panels to the required size
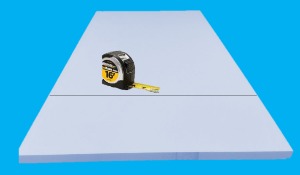
Place the foam on a table and measure out the suitable size, maybe four feet by six feet, with your tape and pencil. Cut it off with your saw, scissors, or knife.
Continue the process until you cut enough panels for the realistic light.
Wrap the panels with black felt
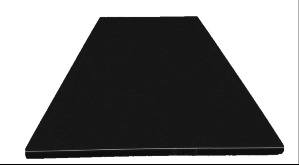
Bring out your felts and measure out the exact size that will cover the whole panel. Put on your glove and spray the adhesive on both sides of the foam so that it will hold the felt firmly on the foam.
Determine the number of strands to be fixed on each panel
Most of the light kits come with 1000 pieces of starry light. Share it among the panels. Each may get up to 150 light bulbs depending on the number of your panels.
Install the star lights on the foam panel
Installation of the light fixture is easy, but takes some time. You may have a design or light pattern in mind, such as writing your name with the stars or any other things. Whichever one you want, it is achievable.
Clean the panel surface with a lint roller to remove all the dust and dirt on it.
In case you have any pattern in mind, sketch it on the panel using your pencil and follow the lines to fix the stars. Otherwise, follow our sky star pattern.
- Count the number of strands you want to install on the panel and write it down.
- Using your marker, make some dots similar to night stars on the surface of the panel. Make sure the dots tallies with the strands you have.
- Stand the panel vertically on the wall to enable you to make holes in the dots using a screwdriver or nail.
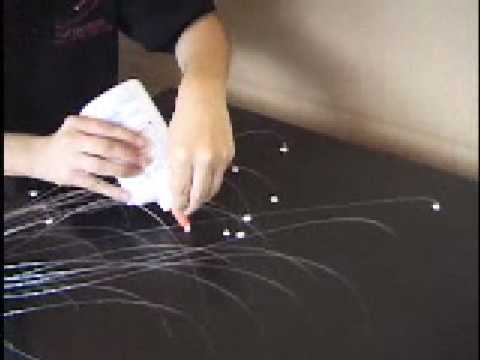
- Make the hole one after the other and feed in the fiber optic cable into it from behind.
- Repeat the process in all the holes and make sure you fix it right.
Fill in the holes with glue and make sure it holds the strands when it dries.
- Allow the glue to dry and then use a few tapes at the back of the panel to hold the strands.
- Repeat the same process on the other panels.
Hang the acoustic panels on your ceiling
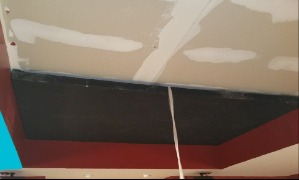
To hang the panels, you need black screws, washers, and a screwdriver.
Get a helper to assist you and place the panel on the ceiling wall, make some slits on it and tighten it firmly to the ceiling.
Note: When tightening the screw, leave about a half-inch gap between the ceiling and panels. This is for easy passage of the strand bundles under the panels.
Repeat the same until you hang all the panels.
Connect the end of the strands to an illuminator

Gather the strands into bundles and open the coupler that comes with the kit. Each coupler can hold about 300 strands.
Feed the strands into the coupler and tighten it. Cut each with a toenail clipper and attach the couplers to your illuminator.
Trim the strands
Use a toenail clipper and trim the strands so that it will appear like a shining star.
Sit behind and enjoy your star ceiling light fixtures.
That’s it, I hope you enjoyed the tutorial? Let me know in the comment section.
Related articles